Premiere Pro and Blackmagic Resolve both offer incredibly powerful standalone features. Even though Adobe and Blackmagic are actively battling it out in a war for our timelines, using the two applications together opens up an entirely new world of possibility.
While the Premiere Pro Lumetri Color panel allows for some speedy color grading and automatic adjustments, many teams benefit from using Resolve’s in-depth color grading tools alongside an Adobe Premiere Pro video editing workflow. Thankfully, both applications support a large variety of file types and formats, which makes for a very complementary experience.
Once you understand the various methods (EDL, XML, and AAF) for completing a Premiere Pro to Resolve roundtrip, you’ll be able to take full advantage of two of the most powerful editing and color grading tools on the market.
It might seem complicated at first, but sending projects from Premiere Pro to Resolve (and vice-versa) is actually pretty straight forward.
Let’s take a look.
Preparing Your Timeline
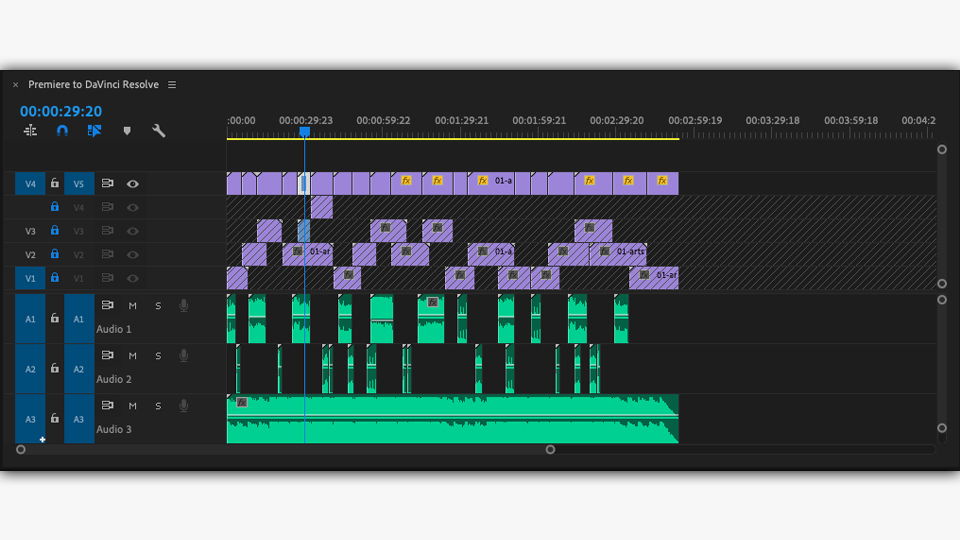
Now that you’ve finished your edit, you’ll need to prepare your timeline for the transition to color. But before you start getting the timeline ready, make a duplicate of your sequence so you’ll have a backup just in case something goes wrong.
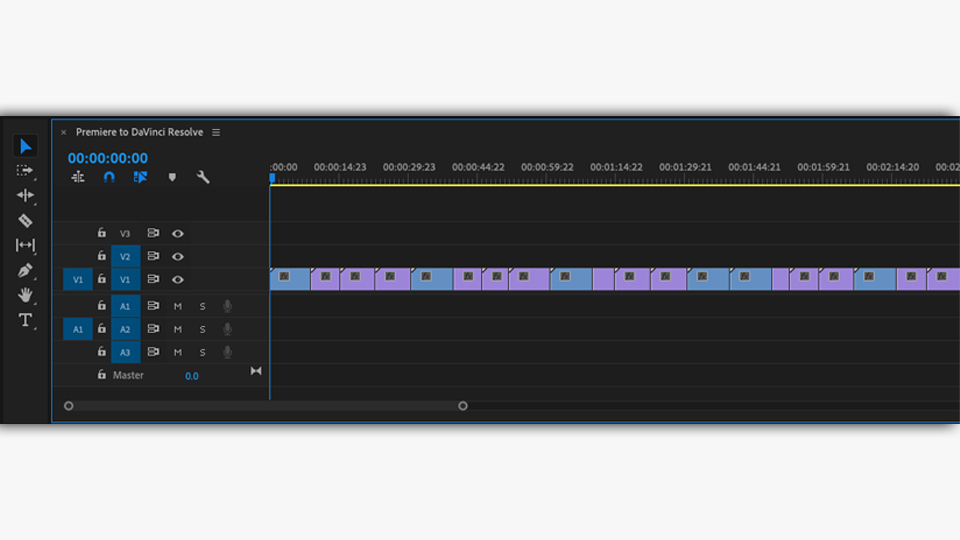
After you’ve duplicated the sequence, the first step is flattening your timeline. You won’t need every layer of video, graphics, and audio while color grading, so flattening everything helps make sure everything you need gets to Resolve in one piece.
Start by flattening your duplicated video sequence so that all your video clips are on V1.
Once you’ve prepped your timeline, there are a few ways for you to export it into DaVinci Resolve: EDL, XML, or AAF.
Using EDL for Premiere to Resolve Roundtrips
EDL stands for an Edit Decision List. And out of the three file formats for a Resolve Roundtrip, it’s the most unique. It can be a little more work up front, but provides a smoother experience in the long run, depending on the project.
You might be familiar with EDL from the days when cutting film meant actually cutting it. Back then, an EDL was a piece of paper with marks that would correspond with each strip of film.
Today, EDL is a list of events that include the source to be recorded and where to record it. It also provides information about transitions, transition durations, and other clip attributes.
Creating an EDL in Premiere Pro
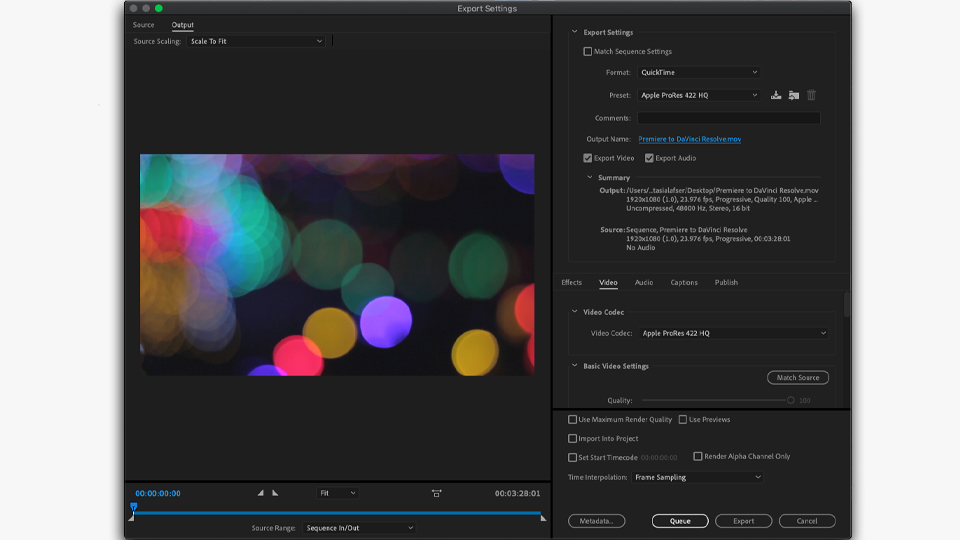
Unlike the other file types used in Premiere to Resolve roundtrips, EDL requires you to first render a new file to use in Resolve. If you want to get the most out of your time in color, it’s important to export your sequence in the highest quality format possible.
Start by choosing whichever codec you (or your workstation) are most comfortable with, to make sure playback in Resolve is smooth. Note: make sure you remove any LUTs or temporary color grades before you export your footage.
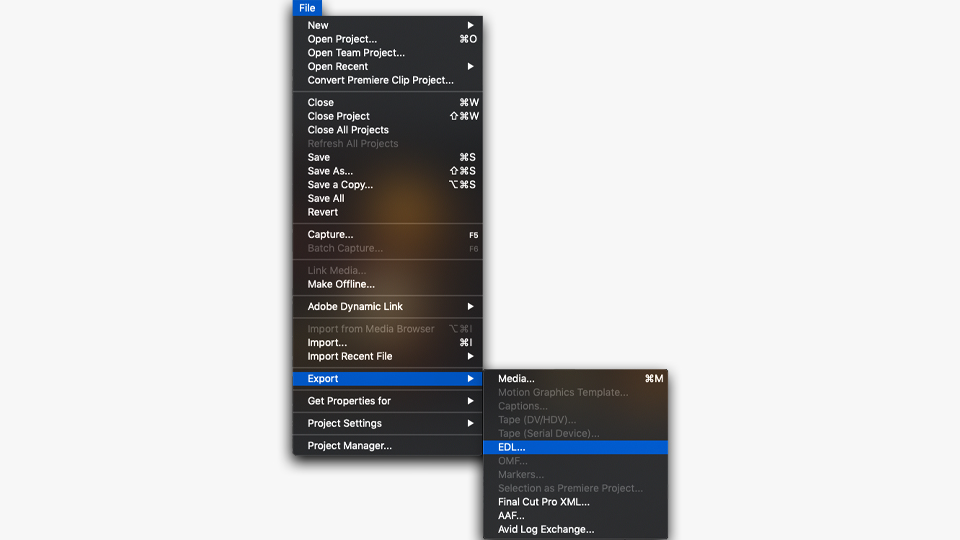
Next, we’re going to export the EDL file from Premiere.
File > Export > EDL
In the EDL export setting menu, we won’t include transitions or audio for this grade. If you do have transitions in your cut, they appear as a black clip in Resolve.
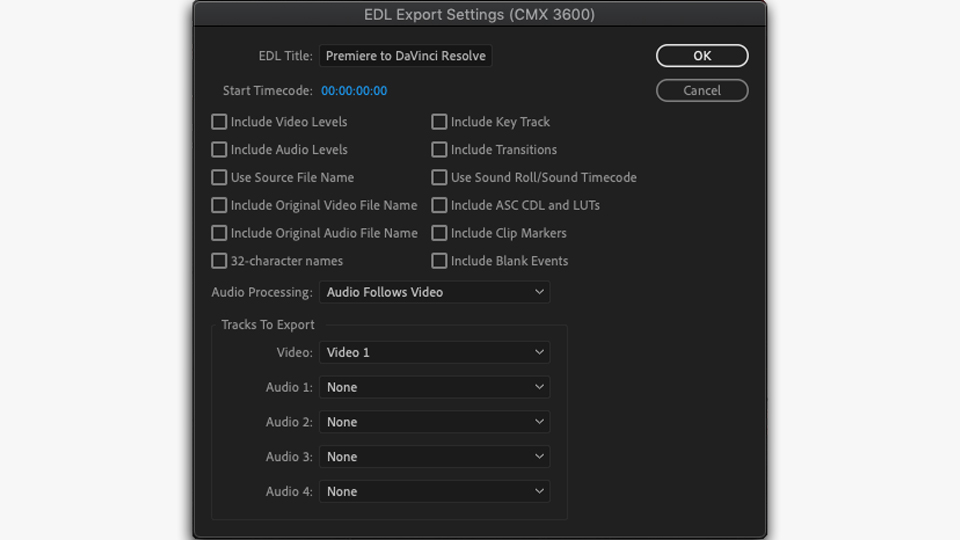
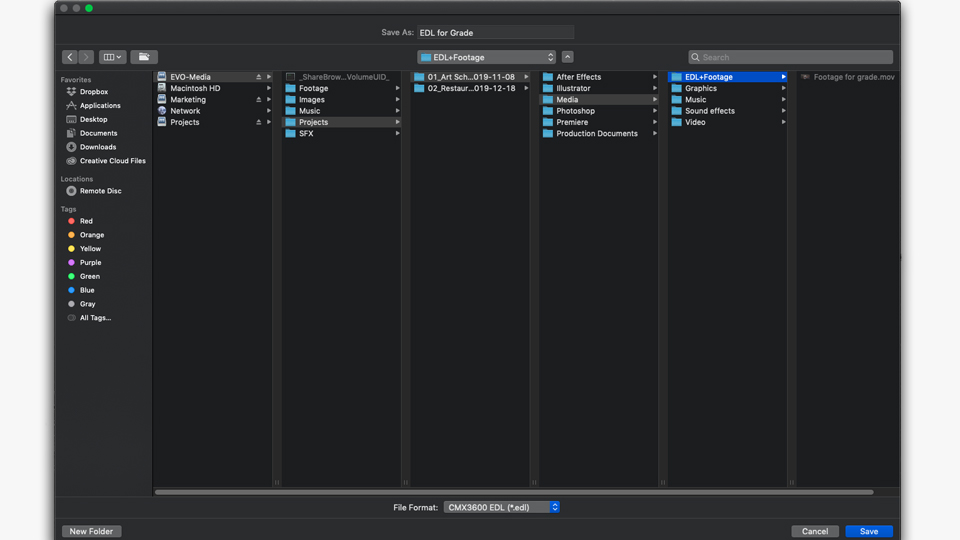
Make sure to create a separate folder for your footage and EDL file to keep things organized.
Importing an EDL into Resolve
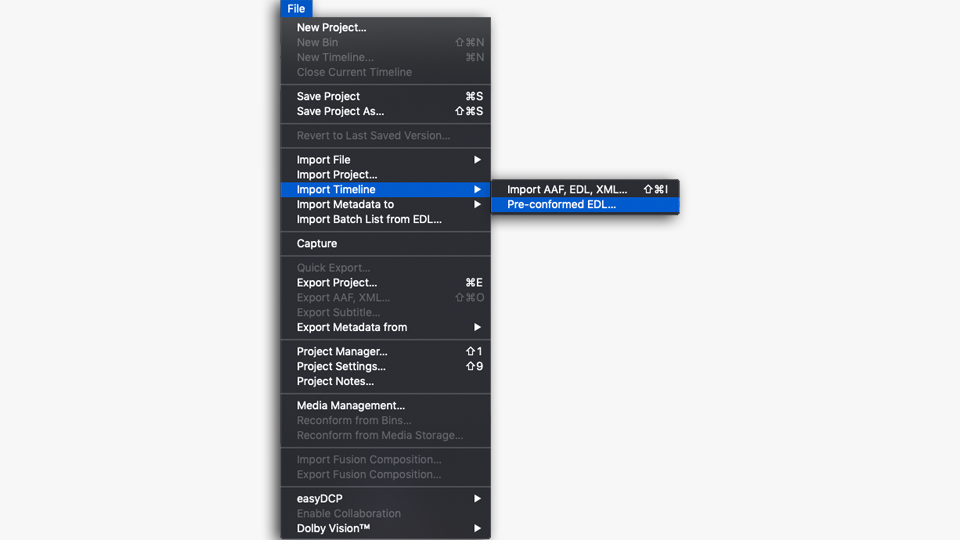
First step is to import your rendered video file. Then import your EDL into Resolve, navigate to the “Media” tab to begin importing your EDL from Premiere.
File > Import Timeline > Pre-conformed EDL
After importing the EDL, all of the cuts from your Premiere sequence should match up with your new Resolve timeline. To be safe, you should switch to the Edit tab and scrub through your timeline to make sure that everything showed up as you expected.
After you’ve checked your timeline, it is time to switch to the Color tab and start grading.
Back to Premiere Pro
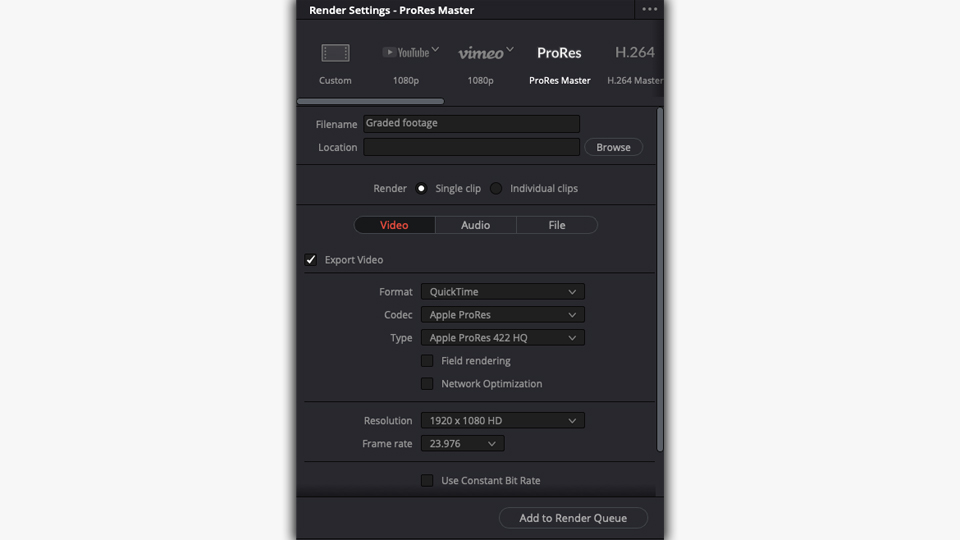
Once your color grade is complete, you’re ready to render the footage and send it back to Premiere for the final step of the roundtrip.
From the Resolve “Delivery” panel, you can select how you want to export the files: as single or individual clips. Choosing “single clip” will export a single file with all of the cuts matching your original sequence. Selecting “individual clips” is helpful for when you need each graded clip on its own.
Add to Render Queue > Start Rendering
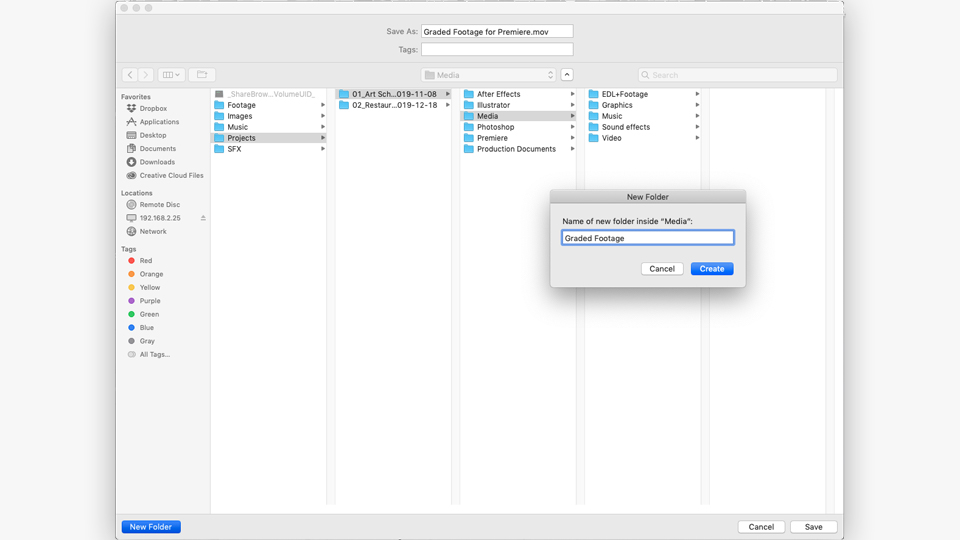
To keep things organized, put your graded footage inside of a dedicated folder on your video editing storage.
Now you’re ready to import your graded footage into Premiere!
Using XML or AAF for Premiere to Resolve Roundtrips
Now let’s take a look at the other methods for Premiere to DaVinci Resolve Roundtrip workflows: XML and AAF.
To the editor or colorist, XML and AAF are very similar, with only some minor differences. The main difference being that AAF includes audio, and is supported by Avid. If you plan to use Pro Tools or Media Composer in your workflow, you should use AAF. If not, XML is the way to go.
The process of getting your timeline from Premiere to DaVinci with XML or AAF is similar to using EDL, except you don’t need to export your actual footage. Because XML and AAF translate your timeline into a data structure that can be read by various applications, they point Resolve to the media location on your storage.
If you’re using a proxy workflow, the XML or AAF file links back to the original camera footage, so you’ll need to make sure the local or shared storage location for those files is accessible.
It’s also important to make sure your workstation can handle editing in the original camera format. If not, exporting a rendered clip in a different codec and using EDL might be a better solution.
From Premiere to Resolve with XML or AAF
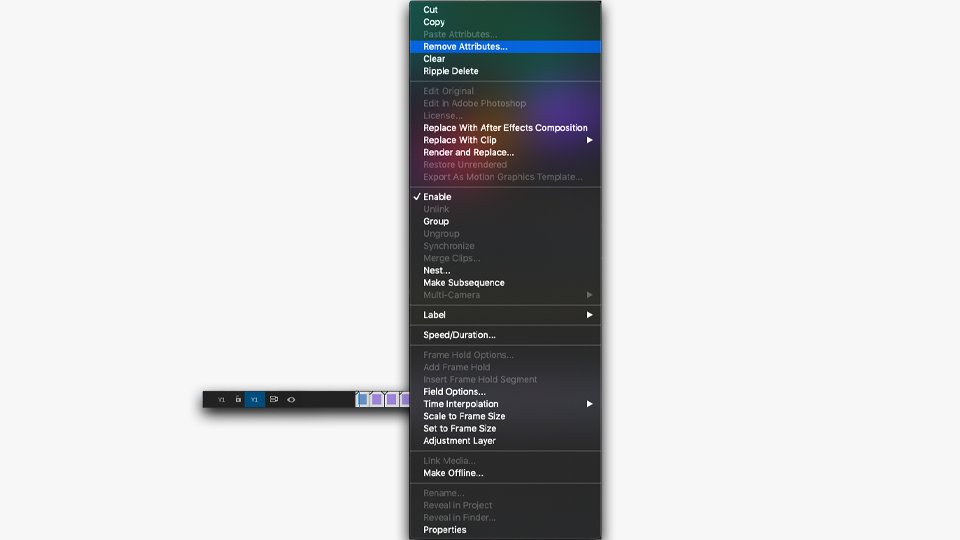
Like with EDL, you should duplicate and flatten your Premiere timeline before you begin. You’ll also want to get rid of audio tracks and remove attributes like effects and transitions.
Select all clips > Right click > Remove Attributes
Even though XML can bring simple transitions into Resolve, they can sometimes lead to errors or a broken XML file.
File > Export > XML

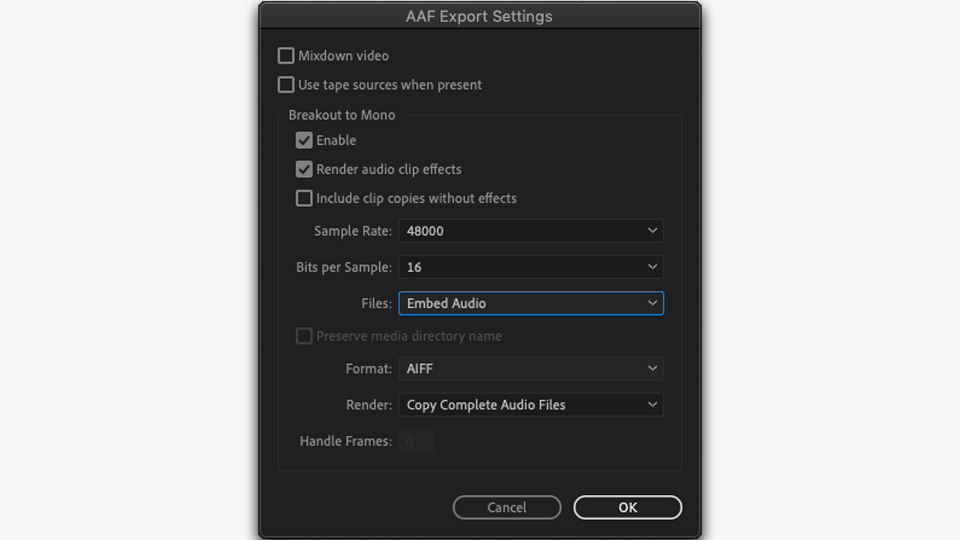
Exporting AAF
When you choose AAF as an export, a settings window will pop up. This is where you select your audio export settings like your sample rate, rendering options, and whether you want to render any audio clip effects.
Importing XML or AAF Into Resolve
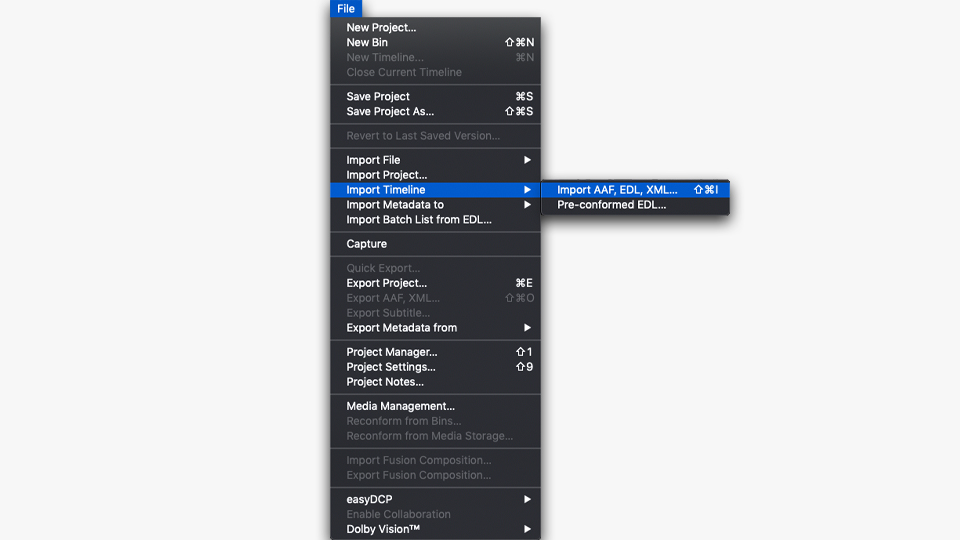
To import your XML file go to the Media tab in DaVinci:
File > Import Timeline > Import AAF, EDL, XML…
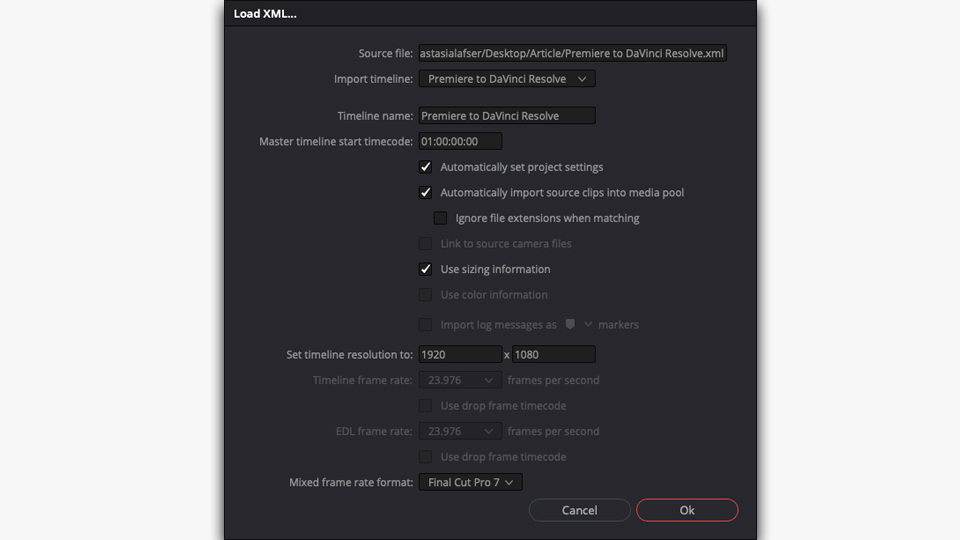
When you import an XML file, a dialogue window appears. In many cases, the default settings will work fine, and our imported timeline matches the original sequence from Premiere. However, you may want to change the timeline resolution, which defaults to 1920×1080.
Export XML or AAF to Premiere
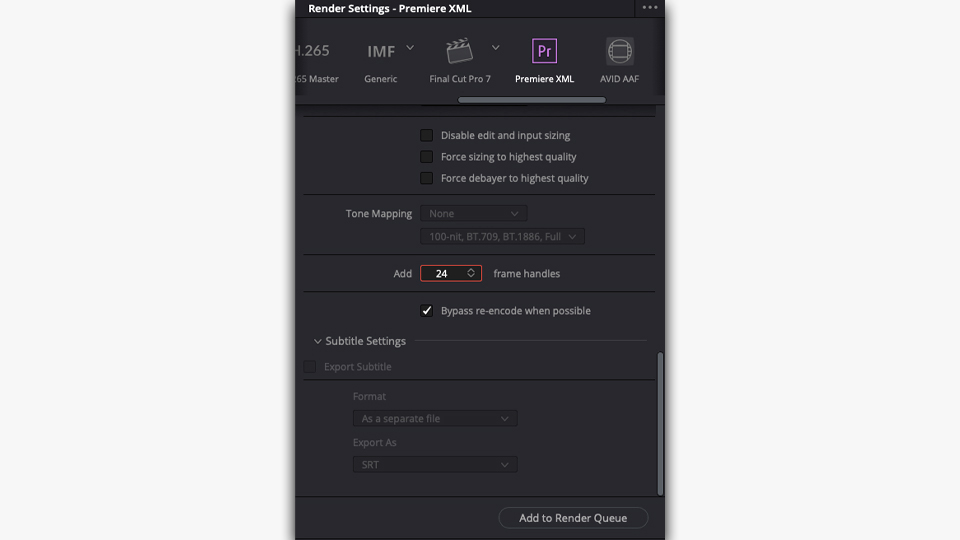
Once your colored footage is ready to be rendered and sent back to Premiere, select the Delivery tab. In Render Settings, choose Premiere XML, or if you need to use Pro Tools or Media Composer at some point in your workflow, choose AAF.
Frame Handles
Frame handles determine the number of frames to include before and after the clips’ in and out points. It’s always best to add at least 24 frames for your export, to make sure you have the flexibility to tweak your clips or transitions once you’re back in Premiere. It’s sure to save you from many headaches down the road.
Add to Render Queue > Start Render
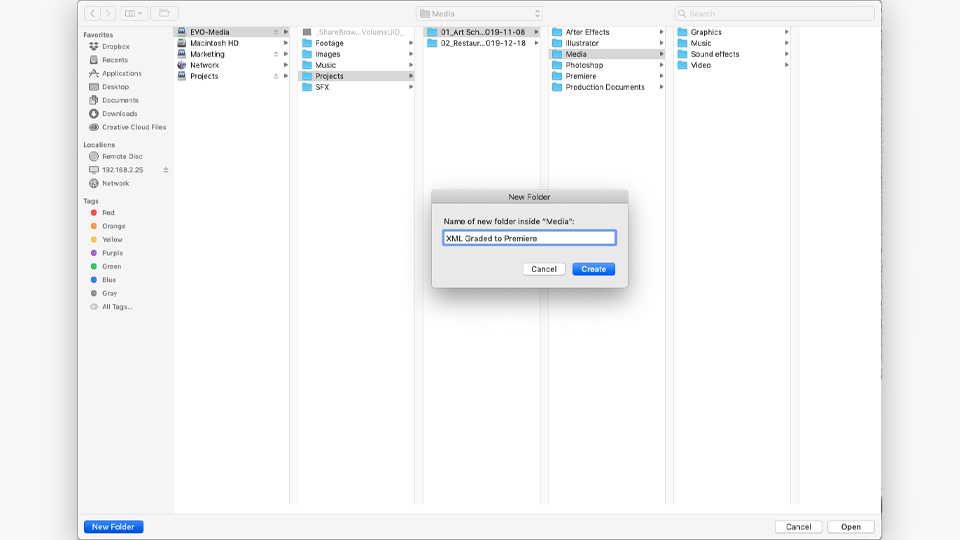
Again, we’ll create a separate folder for our file to make sure it’s easy to find.
Importing XML into Premiere Pro
Before you bring your graded sequence from Resolve back into Premiere, create a new bin for your graded footage to help keep things neat and tidy.
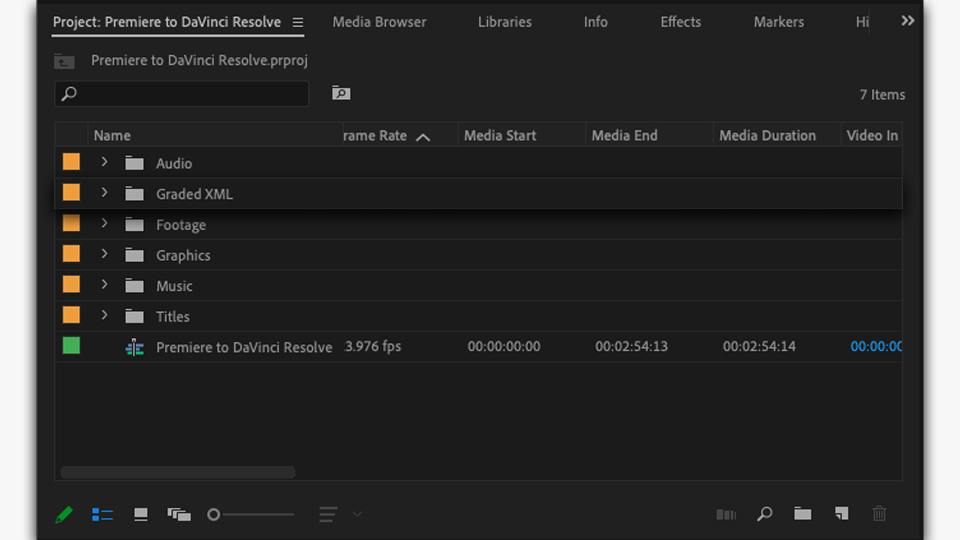
Then you’re ready to import your graded footage and finish your project.
Once the graded footage is in Premiere, you can place it above your original sequence to make it easier to reference any effects, graphics, or transitions, and make sure that your Resolve sequence aligns with the original.
Every Project is Different
There’s no one-size-fits-all roundtrip workflow.
It’s always a good idea to talk to your colorist and strategize workflow before you get started so you know what to expect when it comes time to hand off your edit. Any of these methods could be the best choice. If you have the time, try out all three methods and see which one works best for you and your team.
Follow us @snstweets for more video workflow tips, and contact us anytime for personalized demo of EVO shared storage solutions.
Get a free online demo of the EVO video editing server
Learn how your team can use EVO to start creating amazing content, faster.